[raw]
Steps to Make It.
Rice Recipes
Ingredients
a:9:{i:0;a:3:{s:10:"ingredient";s:2:"01";s:8:"quantity";s:1:"3";s:4:"unit";s:30:"cups Sona Masuri (Masoori) rice, or idli rice";}i:1;a:3:{s:10:"ingredient";s:2:"02";s:8:"quantity";s:1:"1";s:4:"unit";s:30:"cup urad dal (black gram)";}i:2;a:3:{s:10:"ingredient";s:2:"03";s:8:"quantity";s:1:"1";s:4:"unit";s:30:"teaspoon fenugreek seeds";}i:3;a:3:{s:10:"ingredient";s:2:"04";s:8:"quantity";s:1:"3";s:4:"unit";s:30:"cups water, more as needed ";}i:4;a:3:{s:10:"ingredient";s:2:"05";s:8:"quantity";s:1:"1";s:4:"unit";s:30:"teaspoon fine salt ";}i:5;a:3:{s:10:"ingredient";s:2:"06";s:8:"quantity";s:0:"";s:4:"unit";s:30:"Ghee or vegetable oil, as needed";}i:6;a:3:{s:10:"ingredient";s:2:"07";s:8:"quantity";s:1:"1";s:4:"unit";s:30:"medium yellow onion, finely chopped";}i:7;a:3:{s:10:"ingredient";s:2:"08";s:8:"quantity";s:1:"2";s:4:"unit";s:30:"green chillies, such as serrano, finely chopped ";}i:8;a:3:{s:10:"ingredient";s:2:"09";s:8:"quantity";s:3:"1/3";s:4:"unit";s:30:"cup finely chopped fresh cilantro";}}Nutritions
a:7:{i:0;a:4:{s:4:"name";s:8:"Calories";s:8:"quantity";s:3:"850";s:4:"unit";s:4:"kcal";s:11:"description";s:0:"";}i:1;a:4:{s:4:"name";s:7:"Protein";s:8:"quantity";s:2:"20";s:4:"unit";s:1:"g";s:11:"description";s:0:"";}i:2;a:4:{s:4:"name";s:13:"Carbohydrates";s:8:"quantity";s:3:"150";s:4:"unit";s:2:"mg";s:11:"description";s:0:"";}i:3;a:4:{s:4:"name";s:5:"Sugar";s:8:"quantity";s:3:"600";s:4:"unit";s:2:"mg";s:11:"description";s:0:"";}i:4;a:4:{s:4:"name";s:4:"Salt";s:8:"quantity";s:2:"51";s:4:"unit";s:1:"g";s:11:"description";s:0:"";}i:5;a:4:{s:4:"name";s:6:"Energy";s:8:"quantity";s:4:"3560";s:4:"unit";s:2:"kJ";s:11:"description";s:0:"";}i:6;a:4:{s:4:"name";s:3:"Fat";s:8:"quantity";s:2:"30";s:4:"unit";s:1:"g";s:11:"description";s:0:"";}}PHP Directions
a:17:{i:0;a:3:{s:5:"title";s:22:"Gather Ingredients";s:4:"text";s:23:"Gather the ingredients."}}i:1;a:3:{s:5:"title";s:45:"Wash Rice and Urad Dal";s:4:"text";s:109:"Place 3 cups Sona Masuri or idli rice and 1 cup urad dal in separate bowls. Wash and drain until the water runs clear."}}i:2;a:3:{s:5:"title";s:49:"Soak Rice and Urad Dal";s:4:"text";s:170:"Add 2 cups water to the bowl with rice and 1 cup water to the bowl with urad dal. In the same bowl as the urad dal, add 1 teaspoon fenugreek seeds. Leave to soak for 4 to 6 hours."}}i:3;a:3:{s:5:"title";s:61:"Blend Soaked Urad Dal and Fenugreek";s:4:"text";s:99:"Strain the water from the urad dal and fenugreek seeds and add them to a blender."}}i:4;a:3:{s:5:"title";s:62:"Create Urad Dal Batter";s:4:"text";s:182:"Add just enough fresh water to allow the urad dal to begin blending, about 1/4 cup. When the batter becomes sticky and thick, stop and add more water (about 1/2 cup more) and continue to blend."}}i:5;a:3:{s:5:"title";s:39:"Transfer Batter to Bowl";s:4:"text";s:124:"When the batter becomes smooth and fluffy, empty it into a large bowl for fermentation. It needs space to rise."}}i:6;a:3:{s:5:"title";s:38:"Blend Soaked Rice";s:4:"text";s:119:"Strain the rice and add it to the blender. If small, blend in batches, just half or one-third of the rice at a time."}}i:7;a:3:{s:5:"title";s:53:"Create Rice Batter";s:4:"text";s:159:"Add 1/4 cup of water and begin blending. Continue to add water as needed for a smooth, thick, yet pourable consistency, about 1/4 cup more."}}i:8;a:3:{s:5:"title";s:30:"Combine Batters";s:4:"text";s:95:"Once finished, add the rice batter to the urad dal batter and mix it thoroughly with a spatula."}}i:9;a:3:{s:5:"title";s:36:"Add Salt and Ferment";s:4:"text";s:108:"Add 1 teaspoon fine salt, cover the bowl, and transfer it to a warm, dry place. Allow to ferment for 8 to 12 hours."}}i:10;a:3:{s:5:"title";s:51:"Check Batter Readiness";s:4:"text";s:196:"After 8 hours, check your batter. If it has risen considerably and has a slightly sour scent, stir to check consistency. Add water 1 tablespoon at a time if too thick."}}i:11;a:3:{s:5:"title";s:40:"Heat Skillet";s:4:"text";s:94:"Heat a large skillet, preferably nonstick, on medium-high and lightly grease it with ghee or vegetable oil."}}i:12;a:3:{s:5:"title";s:51:"Pour Batter into Pan";s:4:"text";s:134:"Using a ladle, pour a portion of batter onto the center of the pan. It should be of average thickness, not too thin or thick."}}i:13;a:3:{s:5:"title";s:55:"Add Toppings";s:4:"text";s:78:"While still cooking, sprinkle some chopped onions, chilies, and cilantro over top the uttapam."}}i:14;a:3:{s:5:"title";s:60:"Drizzle Ghee and Flip";s:4:"text";s:169:"Drizzle 1 teaspoon ghee or vegetable oil around the edges of the uttapam till golden brown. Once this begins, flip the uttapam using a spatula."}}i:15;a:3:{s:5:"title";s:33:"Press Uttapam Down";s:4:"text";s:95:"Press the uttapam lightly to ensure the toppings stick. Once they begin to brown slightly, the uttapam is ready."}}i:16;a:3:{s:5:"title";s:48:"Serve Uttapam";s:4:"text";s:123:"Repeat until all batter is used. Transfer to a plate and serve hot with coconut chutney and/or sambar."}}HTML Directions
-
1Gather the Ingredients

Gather the ingredients.
-
2Prepare the Rice and Dal
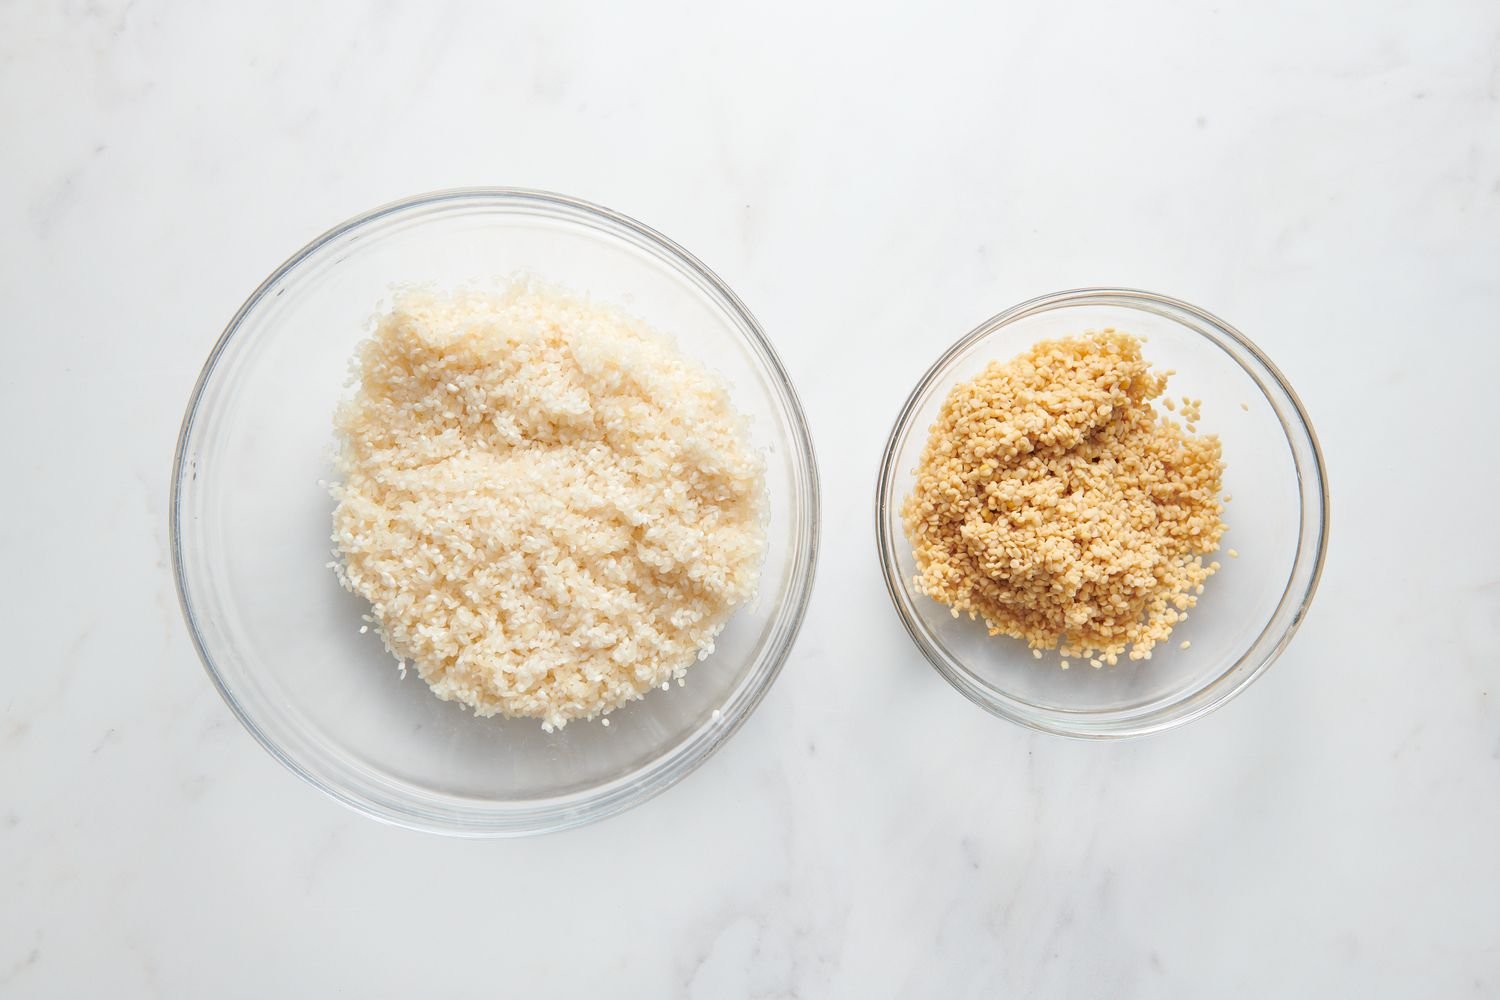
Place 3 cups Sona Masuri or idli rice and 1 cup urad dal in separate bowls. Wash and drain both the rice and urad dal until the water runs clear.
-
3Soak the Ingredients
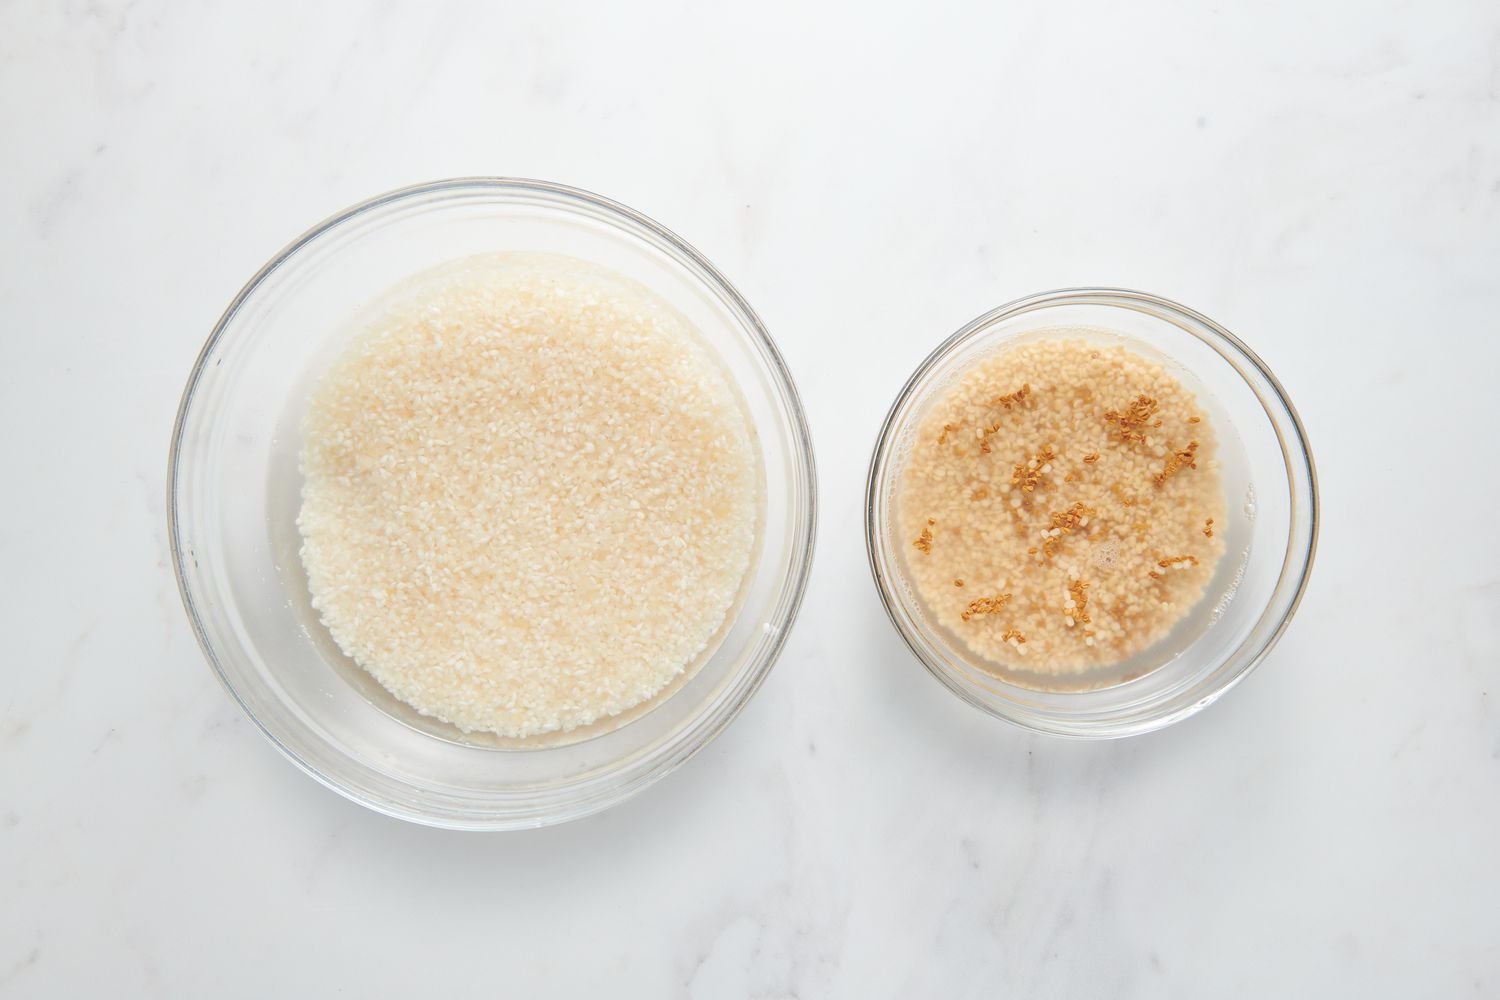
Add 2 cups water to the bowl with rice and 1 cup water to the bowl with urad dal. In the same bowl as the urad dal, add 1 teaspoon fenugreek seeds. Leave to soak for 4 to 6 hours.
-
4Prepare Blender for Mixture
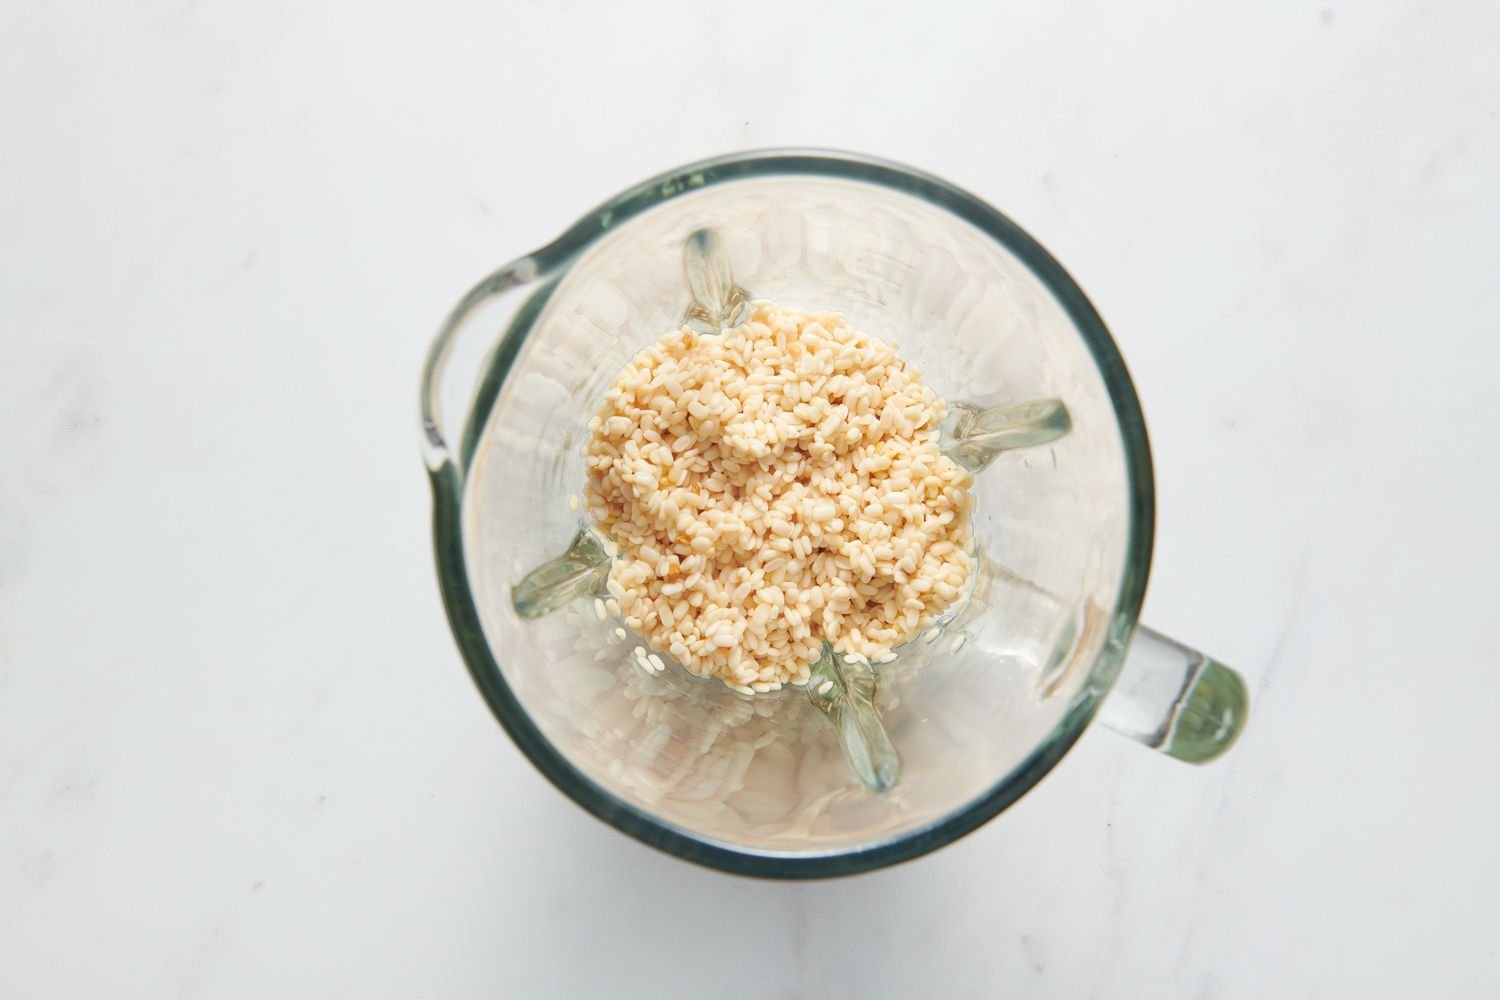
Strain the water from the urad dal and fenugreek seeds and add them to a blender.
-
5Blend the Mixture
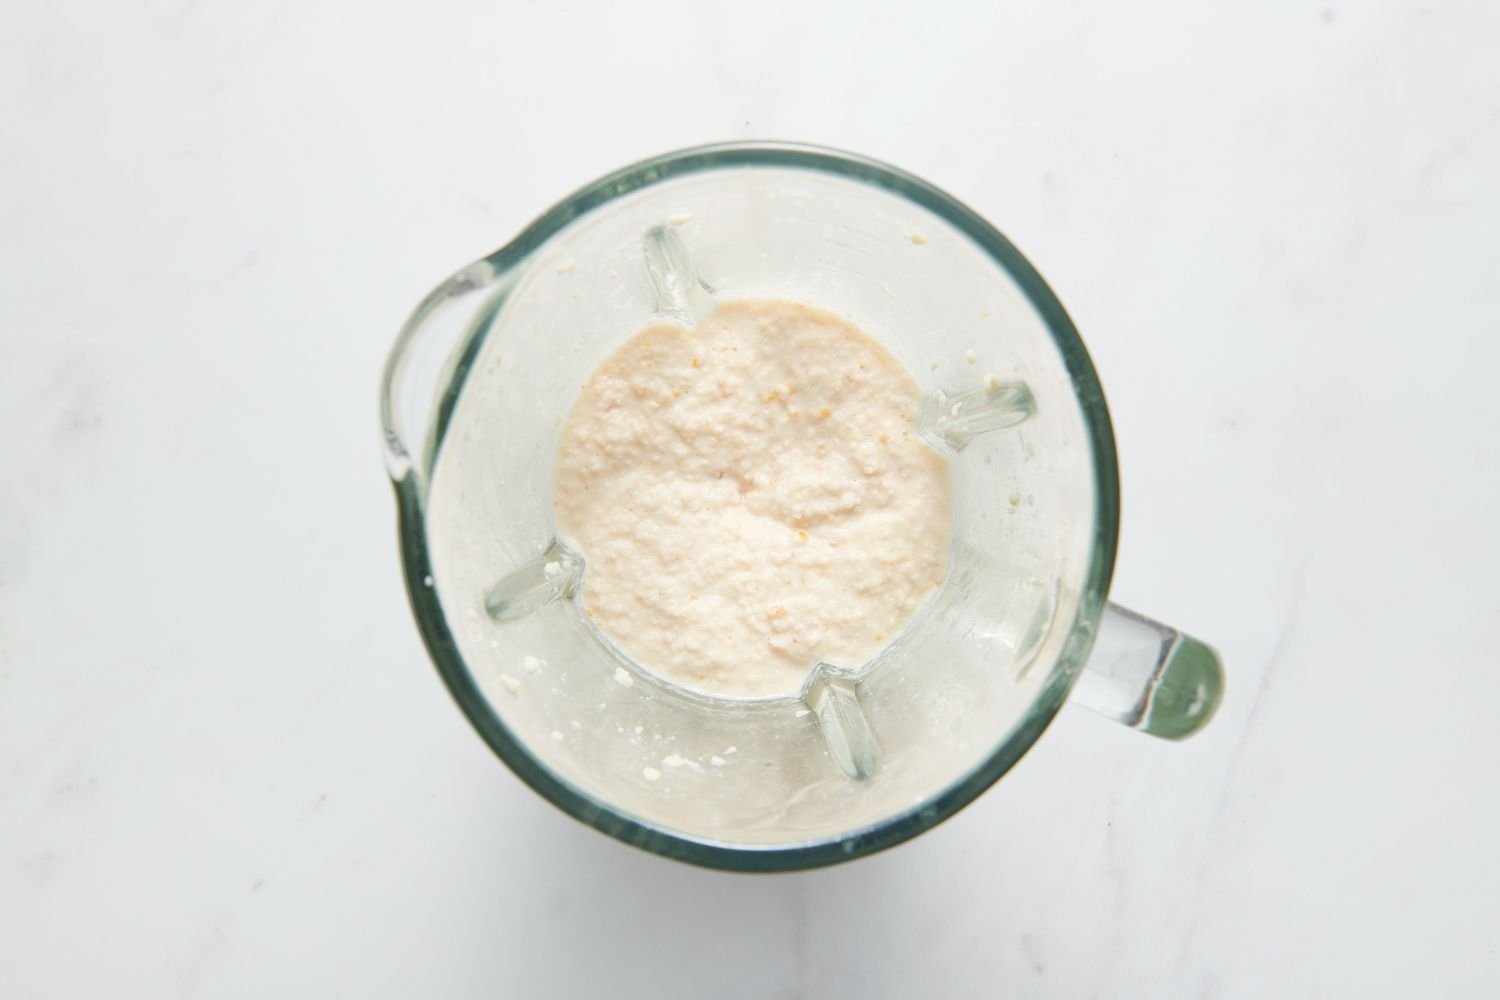
Add just enough fresh water to allow the urad dal to begin blending, about 1/4 cup. When the batter becomes sticky and thick, stop the blender and add more water until the batter is thick, yet pourable, about 1/2 cup more. Continue to blend.
-
6Transfer and Ferment the Mixture
When the batter becomes smooth and fluffy, empty it into a large bowl. This will be the bowl that you ferment your final batter in, so it will need space to rise up to twice its volume. Set aside.
-
7Blend the Rice
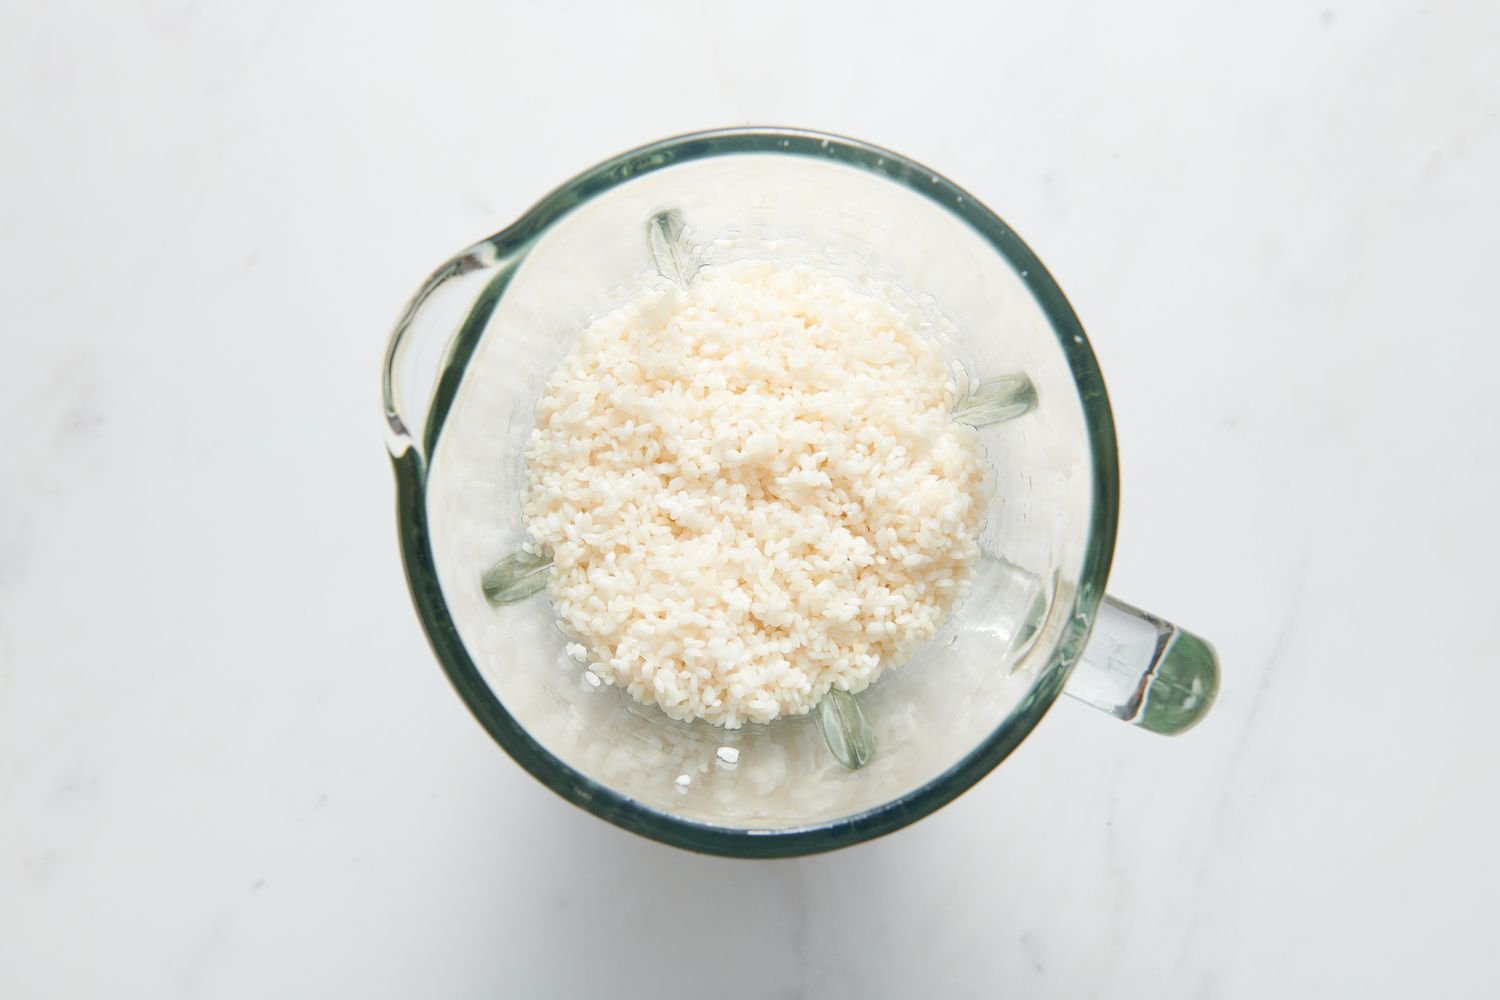
Strain the rice and add it to the blender. If you have a small blender, blend in batches, just half or one-third of the rice at a time.
-
8Make Rice Batter
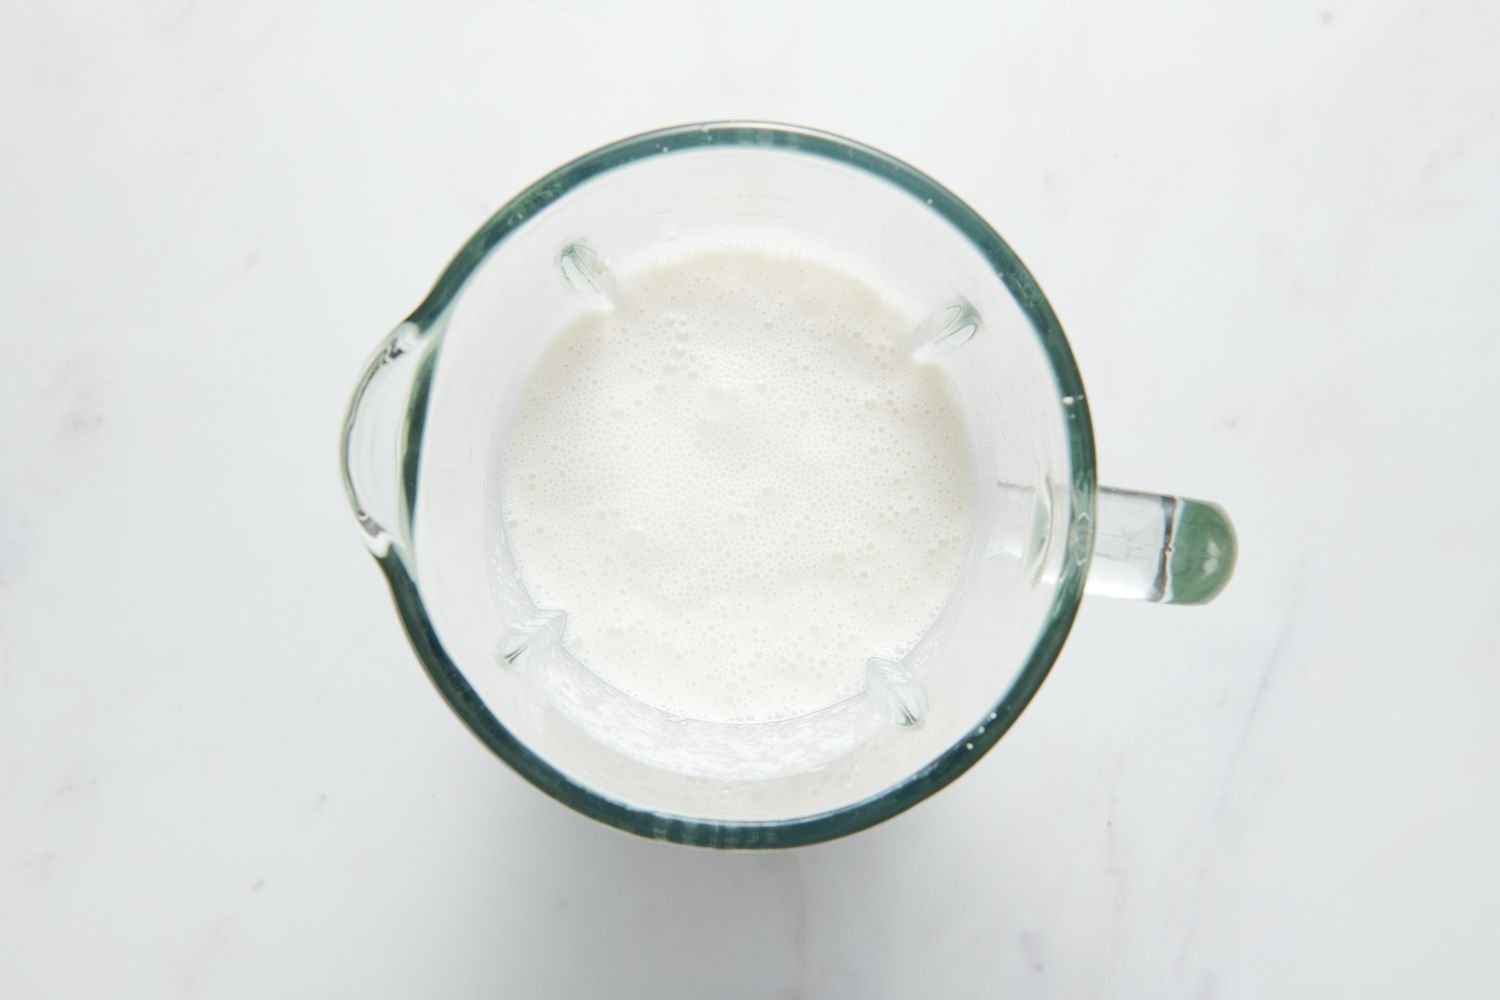
Add 1/4 cup of water and begin blending. Continue to add water as needed, aiming for the same smooth, thick yet pourable, fluffy consistency as the urad dal, about 1/4 cup more.
-
9Combine Batters
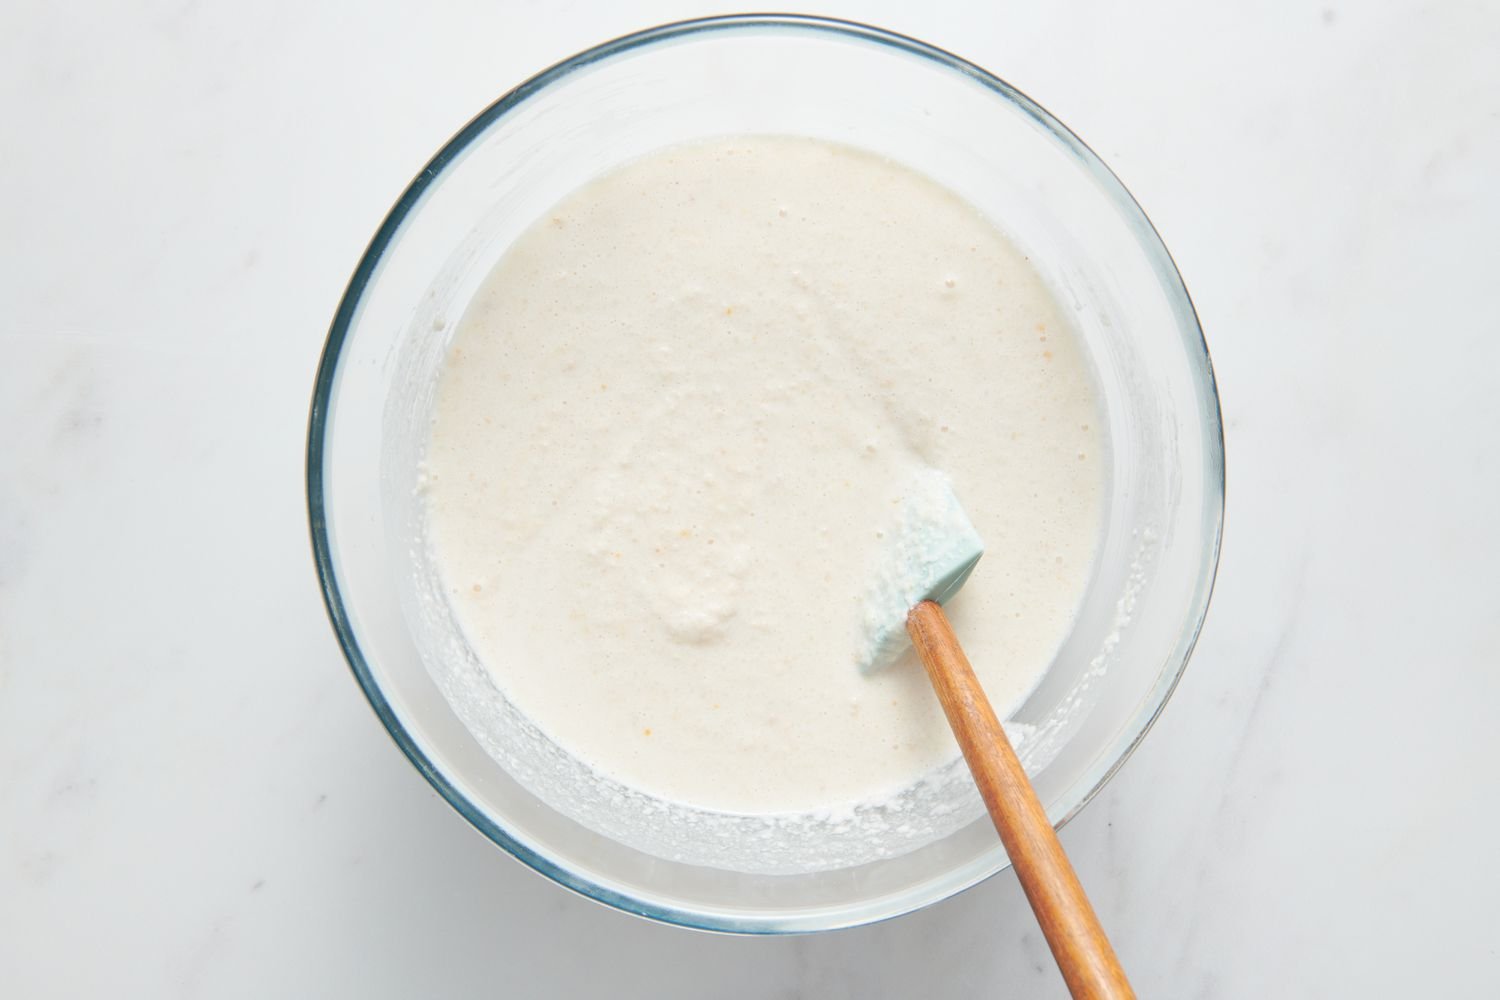
Once finished, add the rice batter to the bowl with the urad dal batter and mix it thoroughly with a spatula.
-
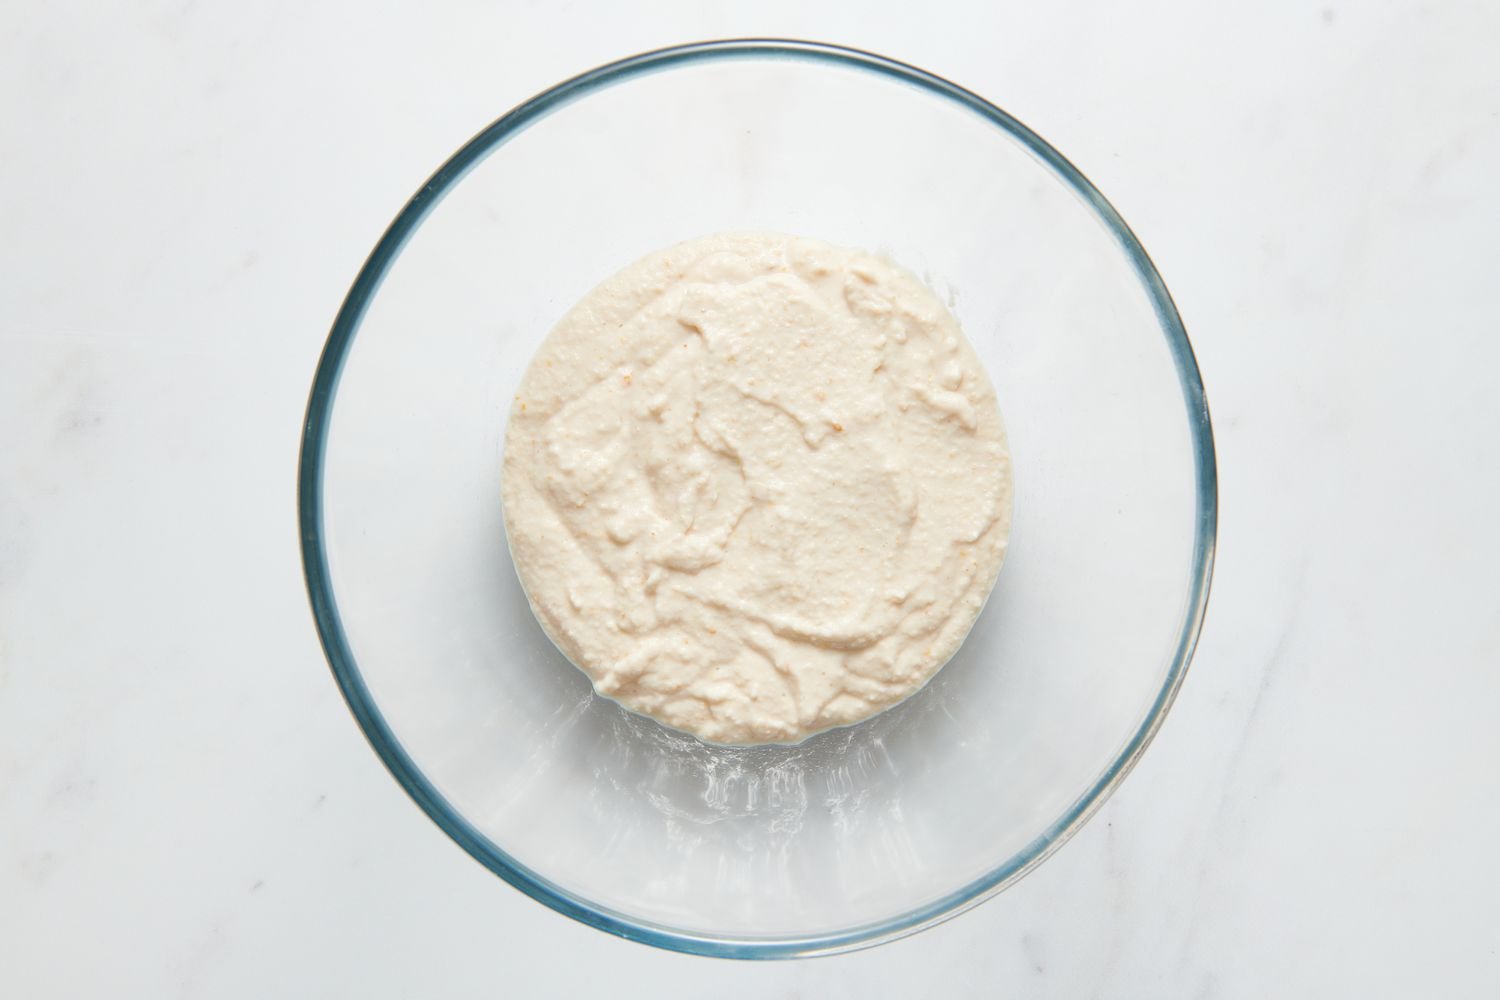
10Ferment the Combined Batter
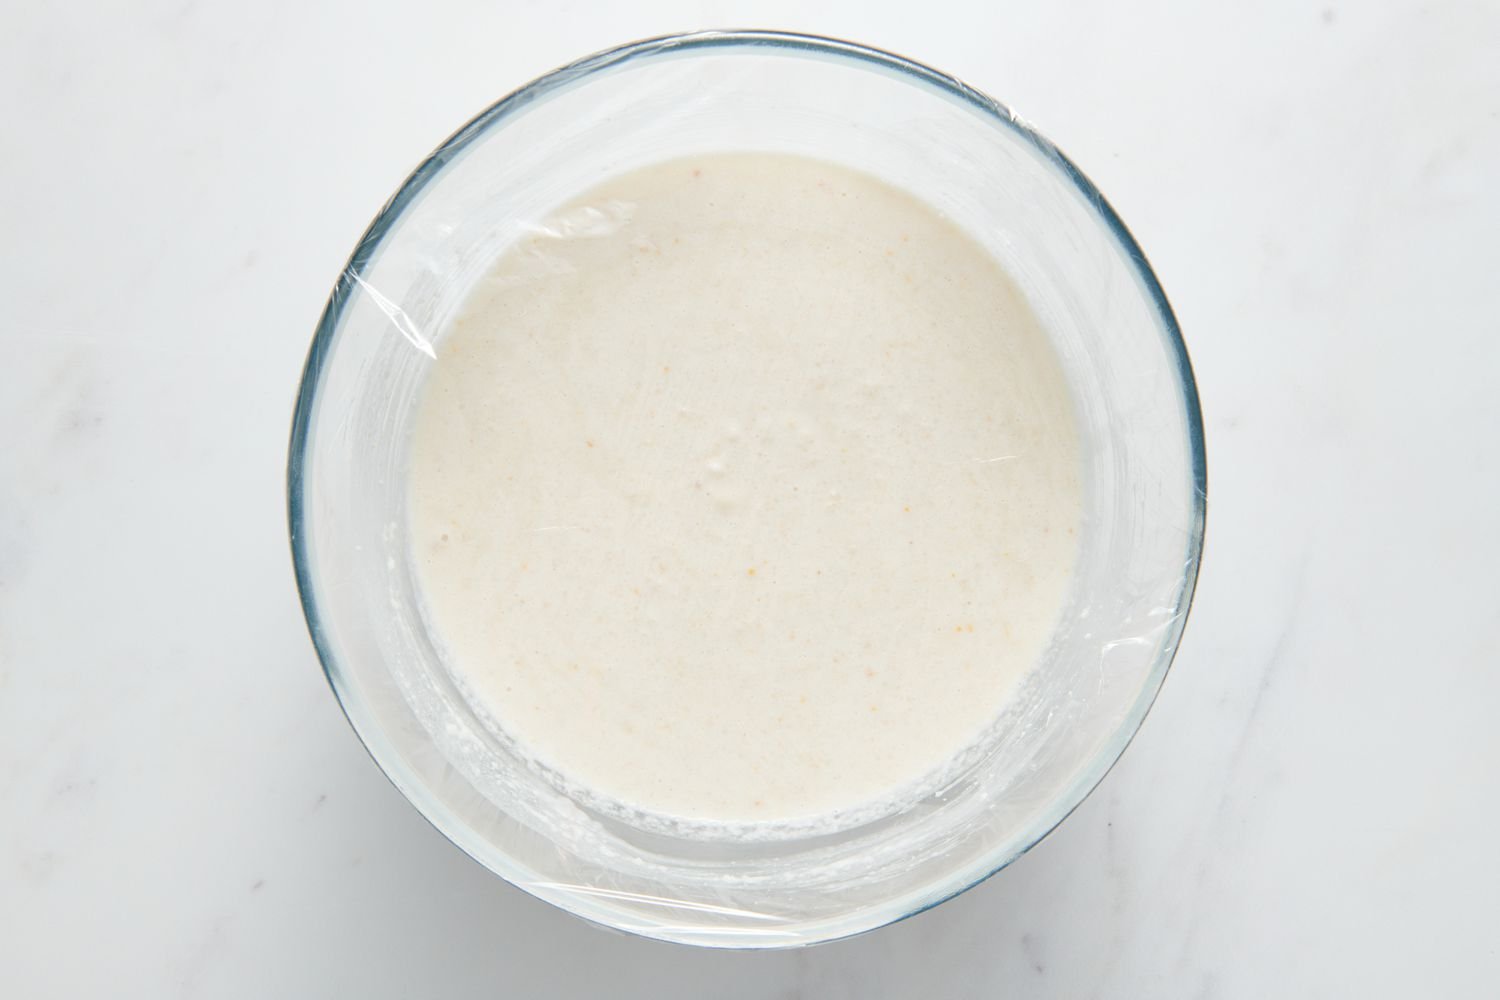
Add 1 teaspoon fine salt, cover the bowl, and transfer it to a warm, dry place. Allow to ferment for 8 to 12 hours.
-
11Check Fermentation
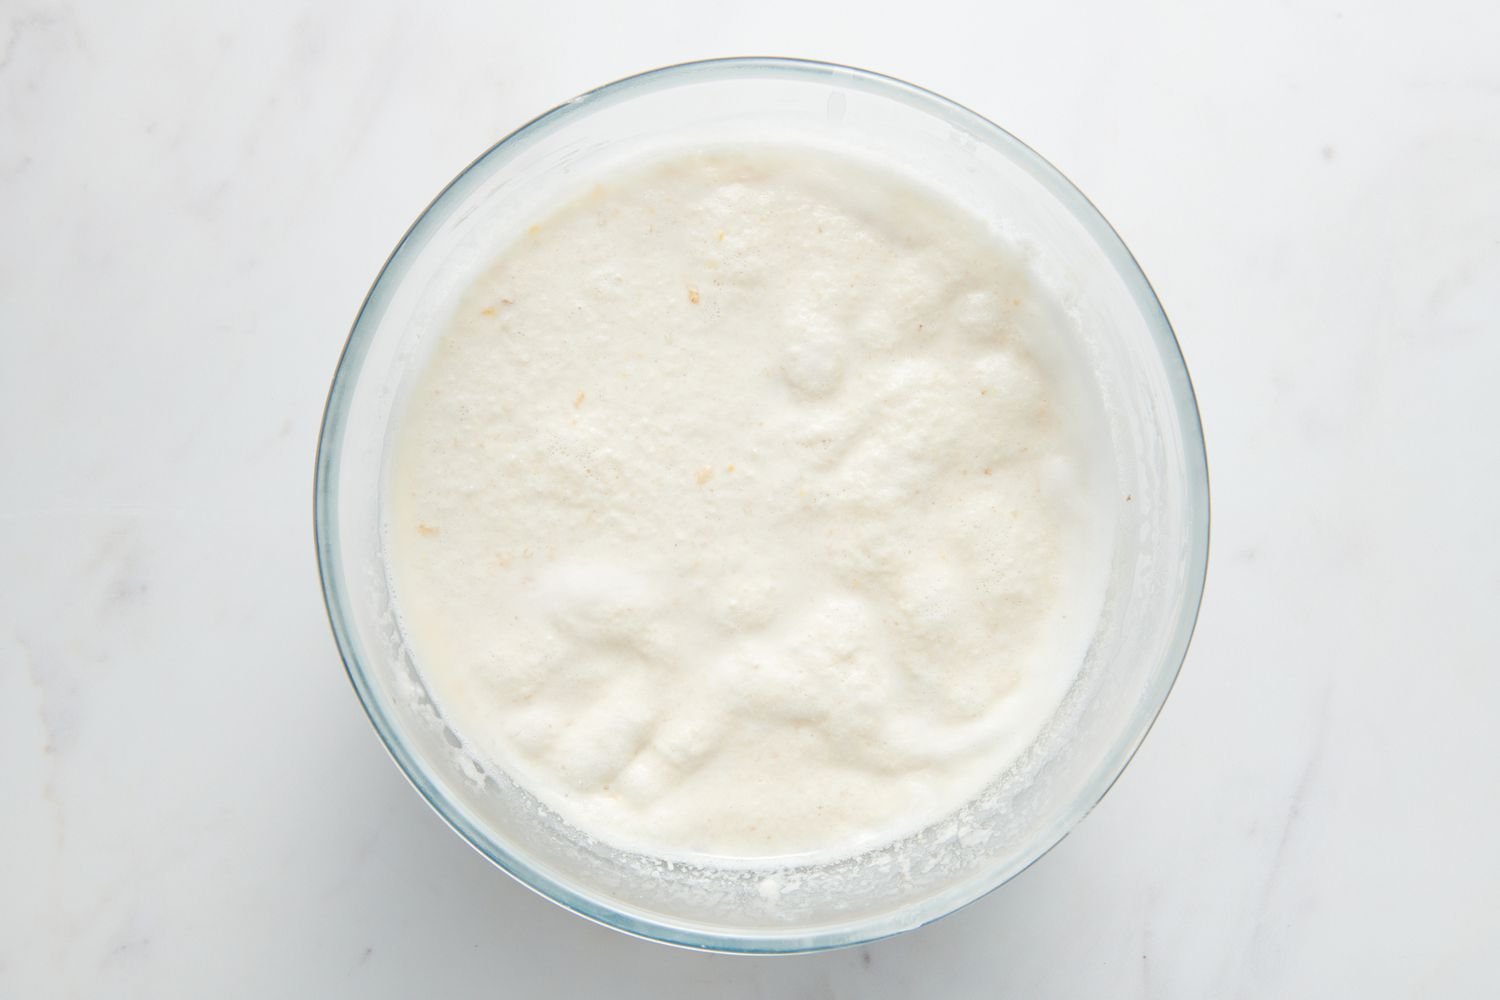
After 8 hours, start checking your batter for readiness. You will know it’s properly fermented if it’s risen considerably (about double in volume) and if it has a slightly sour scent.
-
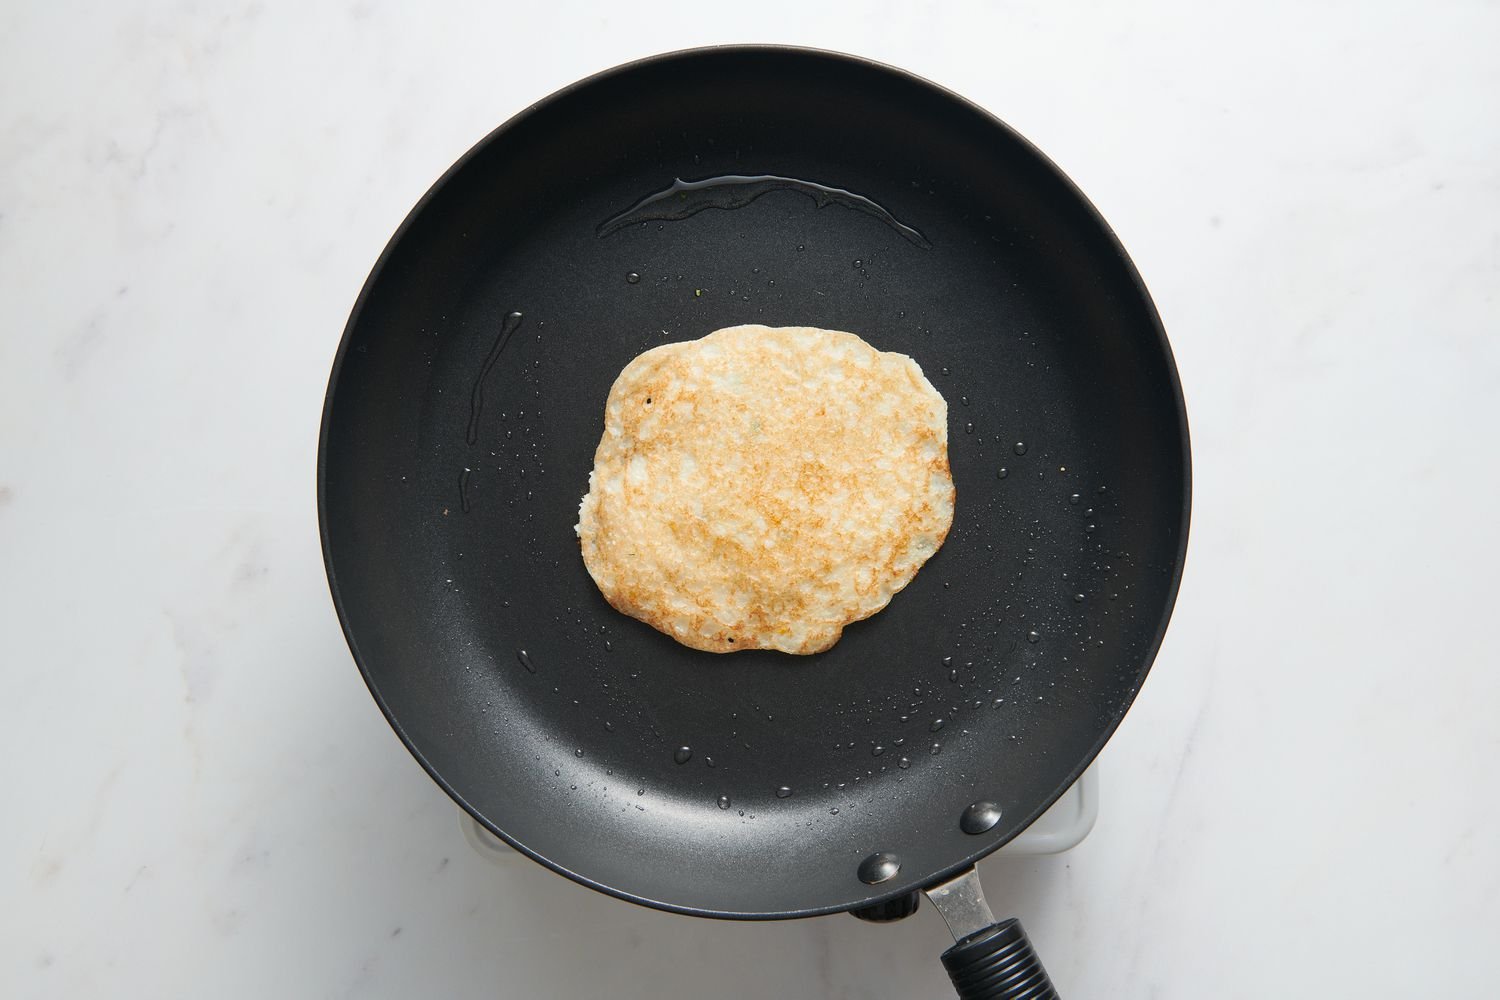
12Cook the Uttapam

Heat a large skillet, preferably nonstick, on medium-high and lightly grease it with ghee or vegetable oil.
-
13Pour the Batter

Using a ladle, pour a portion of batter onto the center of the pan. It should be average in thickness, neither as thin as a dosa or as thick as an American pancake.
-
14Add Toppings

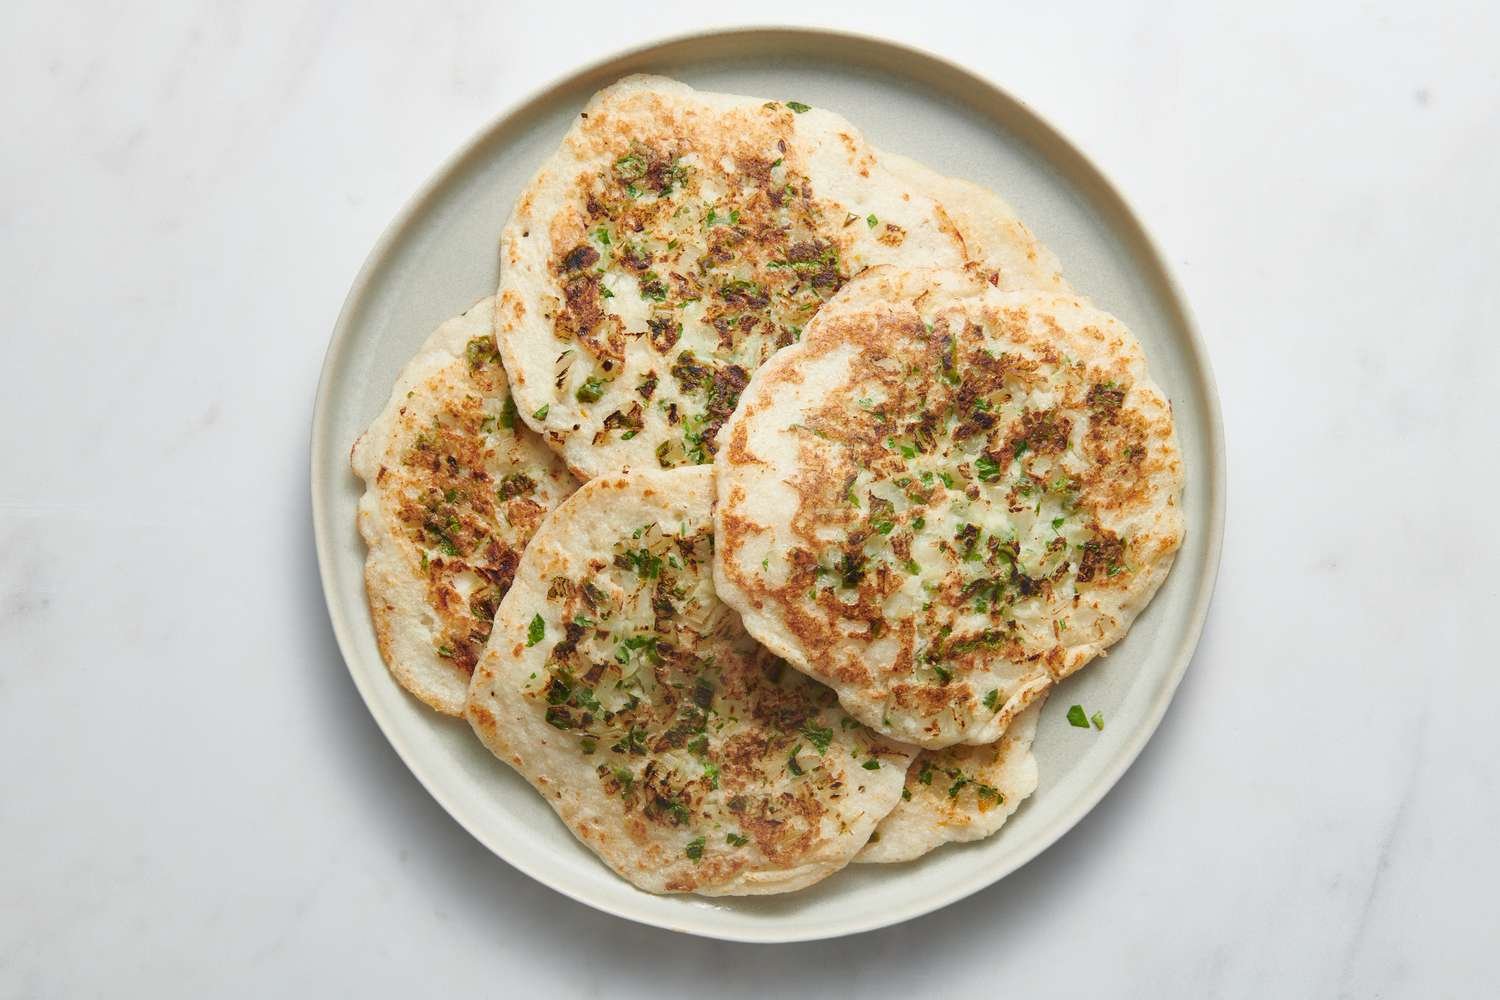
While still cooking, sprinkle some of the chopped onions, chillies, and cilantro over top the uttapam.
-
15Golden Brown Edges
Drizzle 1 teaspoon ghee or vegetable oil around the circumference of the uttapam to encourage the edges to turn golden brown and crisp. Once this begins to happen, flip the uttapam using a wooden or metal spatula.
-
16Final Touches
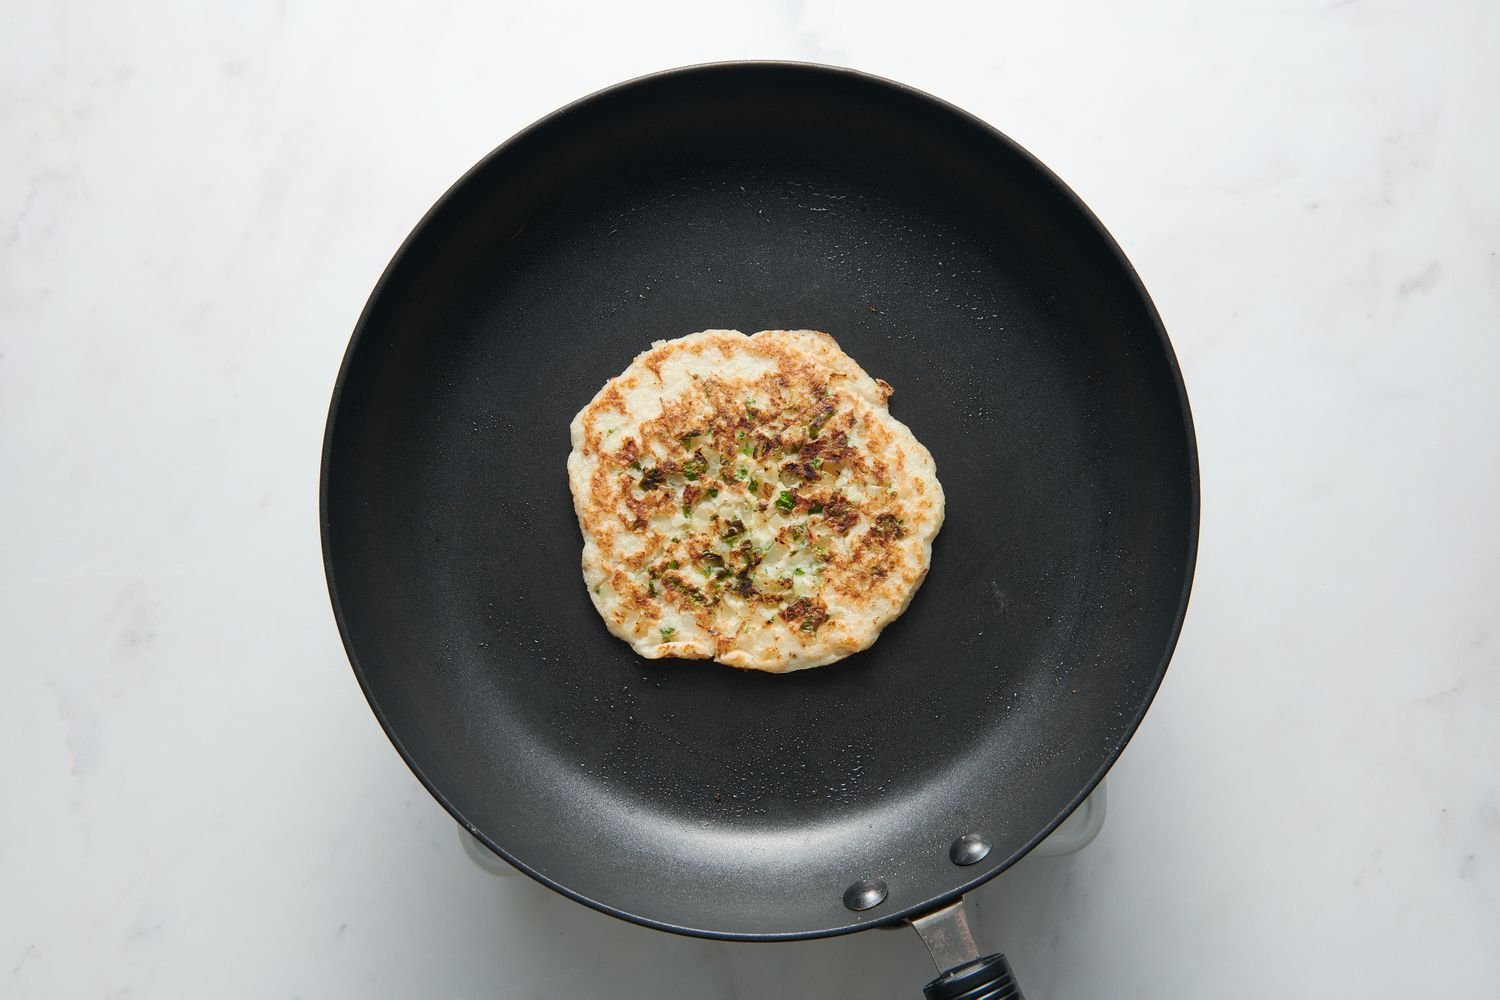
Press the uttapam lightly to ensure the toppings stick. Once the toppings begin to brown slightly, the uttapam is ready.
-
17Serve Hot
Repeat until you’ve used all the batter or until you’ve made as many uttapams as you want. Transfer to a plate and serve hot with coconut chutney and/or sambar.
Uttapam is a South Indian breakfast dish made from a fermented batter of rice, urad dal (a kind of lentil), and fenugreek seeds. Once prepared and poured onto a pan, the optimal texture is crispy on the edges and soft in the center.
Pleasant and lightly sour in flavor, uttapam is like the savory cousin to the sweet breakfast pancake we’re all familiar with. Manali’s mother taught her this recipe, as it checked off many of her requirements during her college years: economical, filling, and nourishing.
Notes On Fermenting the Batter
Overall, this recipe is pretty simple, but the fermentation step could be tricky depending on your experience working with ferments. Luckily, the fermentation period is short for this recipe, so you don’t need to worry about monitoring the batter for very long. Overnight in most climates is ideal, so you can simply prepare the batter the night before you want to enjoy uttapam for breakfast.
Change Up the Toppings
This dish is versatile, so while the toppings we include in this recipe are the classics, feel free to go your own way. For example, Manali’s mother used to make hers with grated beetroot and carrot as a way to sneak more vegetables into her diet.
Uttapam is typically served with coconut chutney and sambar (a sweet and tangy soup), but you may want to switch things up, and that’s okay! You may try another chutney or dust on some podi powder, instead. One of Manali’s favorites is simply to mix a little sambar spice powder with oil and use it for dipping.
The Difference Between Uttapam and Dosa
Lastly, a word on the difference between uttapam and dosa. The two recipes share the same ingredients, but in order to get the thin and crispy texture of a dosa, more rice is used in the batter. That said, in an attempt to simplify things, many Indian households will use the same batter and just spread it out thinner on the pan for cooking.
Tips for Making Uttapam
- The best spatula to use—Use a flat wooden or steel spatula for this recipe, as a silicone one doesn’t work very well for flipping
- Where to buy the right kind of rice—Sona Masuri (masoori) rice can be purchased from Walmart (look for Royal brand) or any Indian store.
- Keep the batter warm—If you live in a cold climate, you may want to store the batter in the oven. Just make sure you leave the oven light on, as it will create more heat and ease the fermentation process.
- When to flip—You know the uttapam is about ready to flip when the sides get golden and crispy.
- Don’t skip the fenugreek seeds—They help the batter to achieve the right texture.
How to Store
It’s important not to make more uttapams than you want for one sitting as they tend to lose their taste. Instead, you can store the remaining batter in the fridge for up to 3 days. It may thicken during this time, which you can amend by simply adding a little water and salt. Allow the batter to reach room temperature before cooking.
Feeling Adventurous? Try This
- Use different vegetables—Other than the toppings used in this recipe, you can use chopped and shredded cabbage, diced tomatoes, peas, diced bell peppers…just about anything.
- Make uttapam with tempered spices—Manali’s personal favorite iteration of this recipe is a tempered uttapam. Exclude the toppings and instead, heat some oil in a small pan and add mustard seeds, cumin seeds, asafoetida, curry leaves, and ginger-chili paste (skip any of the ingredients you don’t have or like). Sauté the spices for a few minutes or until their aroma is released. Then, working quickly, transfer the tempered spices and oil into the batter. Ensure you stand away from the bowl, as the oil may splatter. Mix thoroughly to avoid any lumps and proceed making the uttapams as indicated in the recipe.
[/raw]